Apacheをソースインストールするときにhttp2を有効にする方法
前提
書くこと/書かないこと
別記事でApacheをソースコードからインストールしたときに、mod_http2が有効になりませんでした。
その後の調べで分かった原因と対策を記載します。
環境
AlmaLinux release 8.6 (Sky Tiger) ※CentOS8代替OS
さくっと
内容的にさくっとまとめるのが難しいので後回しにします。
こってりと
libnghttp2
libnghttp2とは
まずはApacheのマニュアルからの抜粋です。
これを見ると、mod_http2にはlibnghttp2が必要と書いてあります。
–enable-http2
HTTP/2 protocol handling in addition to HTTP protocol handling. Implemented by mod_http2. This module requires a libnghttp2 installation. See –with-nghttp2 on how to manage non-standard locations. This module is usually linked shared and requires loading.
apacheのマニュアル
libnghttp2はnghttp2.orgが開発しているHTTP/2のWebサーバまたはライブラリです。
nghttp2はそれ自体がWebサーバの機能を持っているのですが、今回のようにapacheに組み込むHTTP/2のライブラリとして利用する場合は、–enable-lib-onlyでライブラリだけをインストールすることができます。
If you need libnghttp2 (C library) only, then the above packages are all you need. Use –enable-lib-only to ensure that only libnghttp2 is built. This avoids potential build error related to building bundled applications.
https://github.com/nghttp2/nghttp2
libnghttp2のインストール
https://github.com/nghttp2/nghttp2/releasesからソースコードをダウンロードし、インストールしてきます。
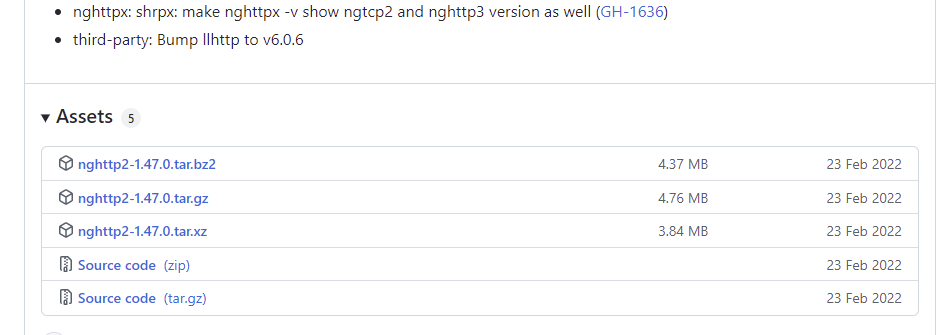
最新版は1.47.0でしたのでこれをインストールしていきます。
# cd /usr/local/src
# wget https://github.com/nghttp2/nghttp2/releases/download/v1.47.0/nghttp2-1.47.0.tar.gz
# cd nghttp2-1.47.0.tar.gz
# tar zxvf nghttp2-1.47.0.tar.gz
# ./configure --enable-lib-only
# make
# make install
これでnghttp2のインストールが完了しました。
Apache
コンフィギュレーション ~ ビルド ~ インストール
先ほどインストールしたnghttp2を指定してApacheを構成していきます。
今回は結論だけ簡潔に記載します。詳細を知りたい方は下記の別記事もご覧ください。
# ./configure --prefix=/usr/local/httpd --enable-ssl --wiith-ssl=/usr/local/openssl --with-included-apr=/usr/local/apr --enable-http2 --with-nghttp2=/usr/local/lib/libnghttp2.so
# make && make install
http2の有効化
インストールした直後はmod_sslとmod_http2は有効になっていないので、httpd.confを編集してモジュールを有効にします。
下記の2行を見つけたら、行頭の#(コメントアウト)を削除して保存します。
LoadModule ssl_module modules/mod_ssl.so
LoadModule http2_module modules/mod_http2.so
次にapacheを起動してモジュールが読み込まれていることを確認します。
ソースコードからインストールした場合はsystemctlで起動・停止を制御するためのUnitファイルが作成されていないので、ここでは動作確認のためにプログラムを直接実行します。
# /usr/local/httpd/bin/apachectl start
# /usr/local/httpd/bin/httpd -M
Loaded Modules:
 core_module (static)
 so_module (static)
 http_module (static)
 mpm_event_module (static)
 authn_file_module (shared)
 authn_core_module (shared)
 authz_host_module (shared)
 authz_groupfile_module (shared)
 authz_user_module (shared)
 authz_core_module (shared)
 access_compat_module (shared)
 auth_basic_module (shared)
 reqtimeout_module (shared)
 filter_module (shared)
 mime_module (shared)
 log_config_module (shared)
 env_module (shared)
 headers_module (shared)
 setenvif_module (shared)
 version_module (shared)
 ssl_module (shared)
 http2_module (shared)
 unixd_module (shared)
 status_module (shared)
 autoindex_module (shared)
 dir_module (shared)
 alias_module (shared)
結果にssl_module (shared)とhttp2_module (shared)があれば、動的共有オブジェクト(DSO)として正しく読み込まれています。
なお、apacheを起動した後で起動状態を確認しようと思ってapachectlにstatusオプションを渡したところ、エラーになりました。
# /usr/local/httpd/bin/apachectl status
/usr/local/httpd/bin/apachectl: 行 95: lynx: コマンドが見つかりません
どうやらstatusオプションの中で呼ばれているlynxコマンドがインストールされていないことが原因のようです。
解消方法についてはこの記事の本線ではないので後日別記事に書きます。
共有ライブラリの確認
念のため、mod_sslとmod_http2が読み込んでいる共有ライブラリも確認しておきます。
# ldd /usr/local/httpd/modules/mod_ssl.so
        linux-vdso.so.1 (0x00007fff5cb98000)
        libssl.so.3 => /usr/local/openssl/lib64/libssl.so.3 (0x00007fc9e621f000)
        libcrypto.so.3 => /usr/local/openssl/lib64/libcrypto.so.3 (0x00007fc9e5bbe000)
        librt.so.1 => /lib64/librt.so.1 (0x00007fc9e59b6000)
        libcrypt.so.1 => /lib64/libcrypt.so.1 (0x00007fc9e578d000)
        libpthread.so.0 => /lib64/libpthread.so.0 (0x00007fc9e556d000)
        libdl.so.2 => /lib64/libdl.so.2 (0x00007fc9e5369000)
        libc.so.6 => /lib64/libc.so.6 (0x00007fc9e4fa4000)
        libz.so.1 => /lib64/libz.so.1 (0x00007fc9e4d8c000)
        /lib64/ld-linux-x86-64.so.2 (0x00007fc9e6704000)
# ldd /usr/local/httpd/modules/mod_http2.so
        linux-vdso.so.1 (0x00007ffdae1fd000)
        libssl.so.3 => /usr/local/openssl/lib64/libssl.so.3 (0x00007f6315e4d000)
        libcrypto.so.3 => /usr/local/openssl/lib64/libcrypto.so.3 (0x00007f63157ec000)
        librt.so.1 => /lib64/librt.so.1 (0x00007f63155e4000)
        libcrypt.so.1 => /lib64/libcrypt.so.1 (0x00007f63153bb000)
        libpthread.so.0 => /lib64/libpthread.so.0 (0x00007f631519b000)
        libdl.so.2 => /lib64/libdl.so.2 (0x00007f6314f97000)
        libnghttp2.so.14 => /lib64/libnghttp2.so.14 (0x00007f6314d70000)
        libc.so.6 => /lib64/libc.so.6 (0x00007f63149ab000)
        libz.so.1 => /lib64/libz.so.1 (0x00007f6314793000)
        /lib64/ld-linux-x86-64.so.2 (0x00007f631632f000)
OpenSSLもlibnghttp2も指定したライブラリを参照していることが確認できました。
Unitファイルの作成や自動起動の設定などまだ少しやることはありますが、「Apacheをソースインストールするときにhttp2を有効にする方法」という目的は達成したので今回はここまでにします。